My Best Home Office Adjustable Height Desk: Not What You Think
Disclaimer: This post may contain affiliate links. These links, if used and purchases made, we may earn a small commission. These affiliate programs do not impact the recommendations we make or the resources we refer you to. Our focus is on providing you the best resources for your nonprofit journey.
I recently changed to being a full-time employee who spends 8+ hours in my home office sitting all day long in front of computer screens while working on projects and solving problems. Outfitting the remote home office is important for physical health and productivity, not to mention my mental health.Besides the project management tools, remote team collaboration tools, and remote staff management routines we use, the physical work from home space is important for long-term success.
In this article, I discuss the best moderate budget home office standing desk solution for full-time home office workers. Specifically, I’ll give you my choices for frame, desktop, and cable management trays. We’ll include pictures and mounting dimensions to get the most stable setup with these pieces.
We’re not talking about the most convenient purchase from a single vendor, but rather how I brought key pieces together with some light elbow grease, in order to deliver the best and longest value and saved over 51% of the cost.
If you are in a hurry, here is a link to the full shopping list that has links to all of the products for your convenience.
Let’s get into it.
What is a standing desk?
A standing desk is any work surface that allows you to perform regular desk-based work activities while standing up, rather than sitting in a chair. This means the work surface should ideally be between 36.5″ and 49.5″ in order to work best for people whose height is between 5′ 0″ and 6′ 8″.
Because the height of the person correlates to the correct height for the work surface, it is difficult to create a fixed, stationary, height desk that can accommodate more than one person well. That’s where adjustable height standing, or stand-up, desks come in.
With an adjustable height desk, you can move the height of the work surface based on where your forearms will be parallel to the floor. This is the ergonomic shape you are looking for.
During a given workday I may start by sitting with the desk at 26.5″-28″ high depending on how I want to sit. Then, when it’s time to get a fresh perspective or stretch my body, I’ll move the desk to somewhere between 43.5″-46.5″. Again the height can vary depending on how I am feeling.
Have the ability to make small adjustments is key.
So, let’s get into my setup and why I made these selections.
Standing Desk Frame
When first deciding to start a full-time remote home-office role, I knew that having a dedicated office with the right gear was going to be important for the long haul.
The central piece of that setup was the desk and the chair.
Thankfully I had purchased a refurbished Herman Miller Aeron chair a couple of years ago. So, the chair was covered. Now we needed the right desk.
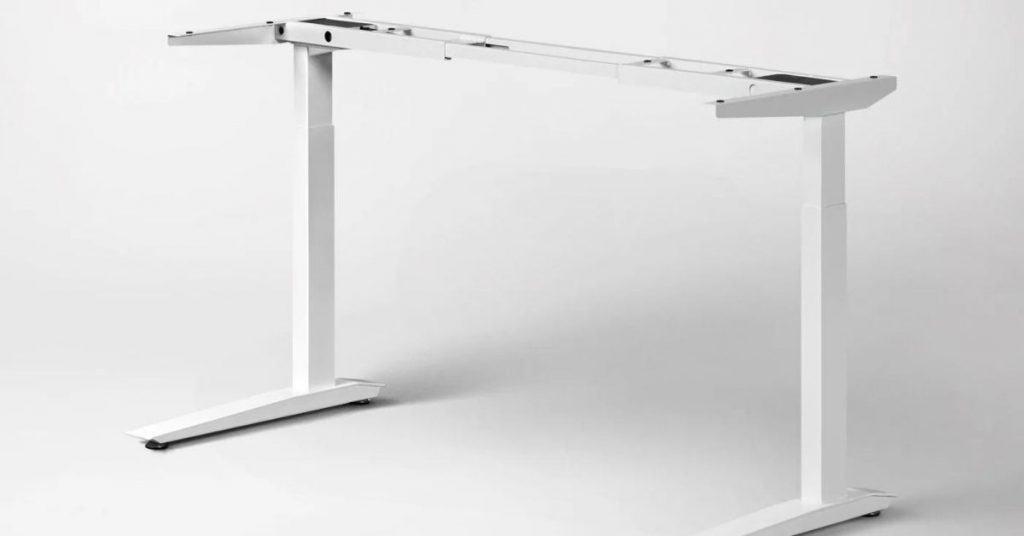
After researching many options, I landed on the Fully Jarvis frame kit. Why the kit?
Well, I recognized that the core of any standing desk is the frame and legs. If I spent the budget on high-quality legs then I could place any top that I want at any time. Over time, I can change the desktop material, width and depth.
That allows the desk to grow with me over time.
Specifically, my choice was the Jarvis Frame Only kit, in the 3-stage, wide version and the programmable memory control.
The 3-stage frame was chosen because the legs go from 24.5″ to 50″ in range. This is the biggest range for all Jarvis leg types.
The wide-leg frame was selected because it fits my initial 4′ desk width but can expand to support from 44″ to 82″ tops. Again, flexibility for the future is the key here.
Finally, the programmable memory controller is a must so that you can create memory presets for your most common sitting and standing heights. If you share the desk with a significant other, there are four memory slots so you can each set a sitting and standing height preset.

Why this brand and frame?
There are a few reasons why the Fully Jarvis Frame is the best standing desk for home office use.
- Quality – Fully uses some excellent motors and the Jarvis frame is a dual motor frame meaning that each leg has its own motor.
- Capacity – Due to the dual-motor design, the Fully Jarvis frame legs have a capacity of 350 lbs. That is plenty for a large solid wood desktop, computer gear, monitors, console, speakers, docking station and network switch.
- Warranty – Fully has one of the best warranties of any electric standing desk frame manufacturers. They have a simple 15-year warranty. That’s right, 15 years. I have peace of mind making this investment. https://www.fully.com/en-gb/jarvis-warranty
- Height Adjustment Range – Again, the Fully Jarvis frame in the 3-stage configuration offers one of the largest adjustment ranges.
- Quiet – Even though this is a dual motor frame, the motors are quiet. The specification says they operate at less than 50 dB. I’ve measured mine at a level of 46.7 dB(A). That’s quiet. I’m happy to adjust the desk at 2:00 am with others asleep in the next room without a second thought.
Is it really cheaper to buy the frame only?
Here’s the kicker, the equivalent all-in-one configured Fully Jarvis desk with a solid wood top was $1399 USD excluding taxes and shipping. I built mine for $632.82 and that includes taxes and shipping. That’s less than half the cost. Wow! I’m sure you’ll be happy to save over $766.18, too.
Solid Wood Desk Top
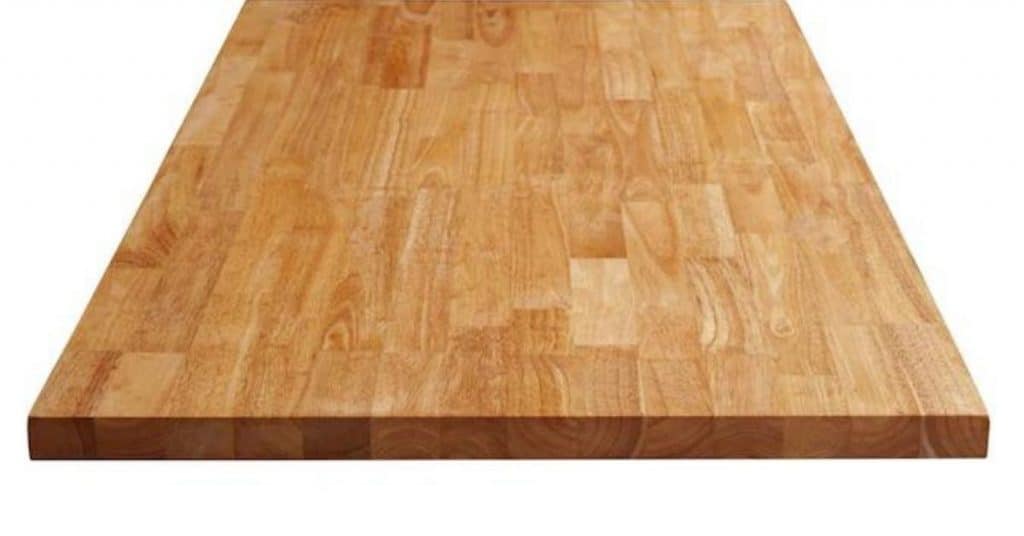
Sorry y’all, but if I have a choice, I’m going for a solid wood top rather than MDF, particleboard, or any other laminated desktop.
Why? One of the biggest reasons is so that I can secure mount, unmount, remount and change up the under-desk mounting over time. Solid wood allows you to do that over and over and over again without fear of eventually breaking off big chunks of glued sawdust that is a desktop.
Secondly, you can choose the type of wood and finish it yourself with a stain or polyurethane that matches the other pieces in your home office.
In my case, I went with a budget-friendly option given the price of other woods following the 2020 wood price surge.
My selection was the Rubberwood 4-ft Unfinished Natural Straight Butcher Block Kitchen Countertop from Lowes. Like the Fully Jarvis Frame, the butcher block top was ordered online and delivered to my front door which was super convenient.
How do you finish an unfinished butcher block desktop?
The butcher block top selected comes in an unfinished condition. That means a couple of things.
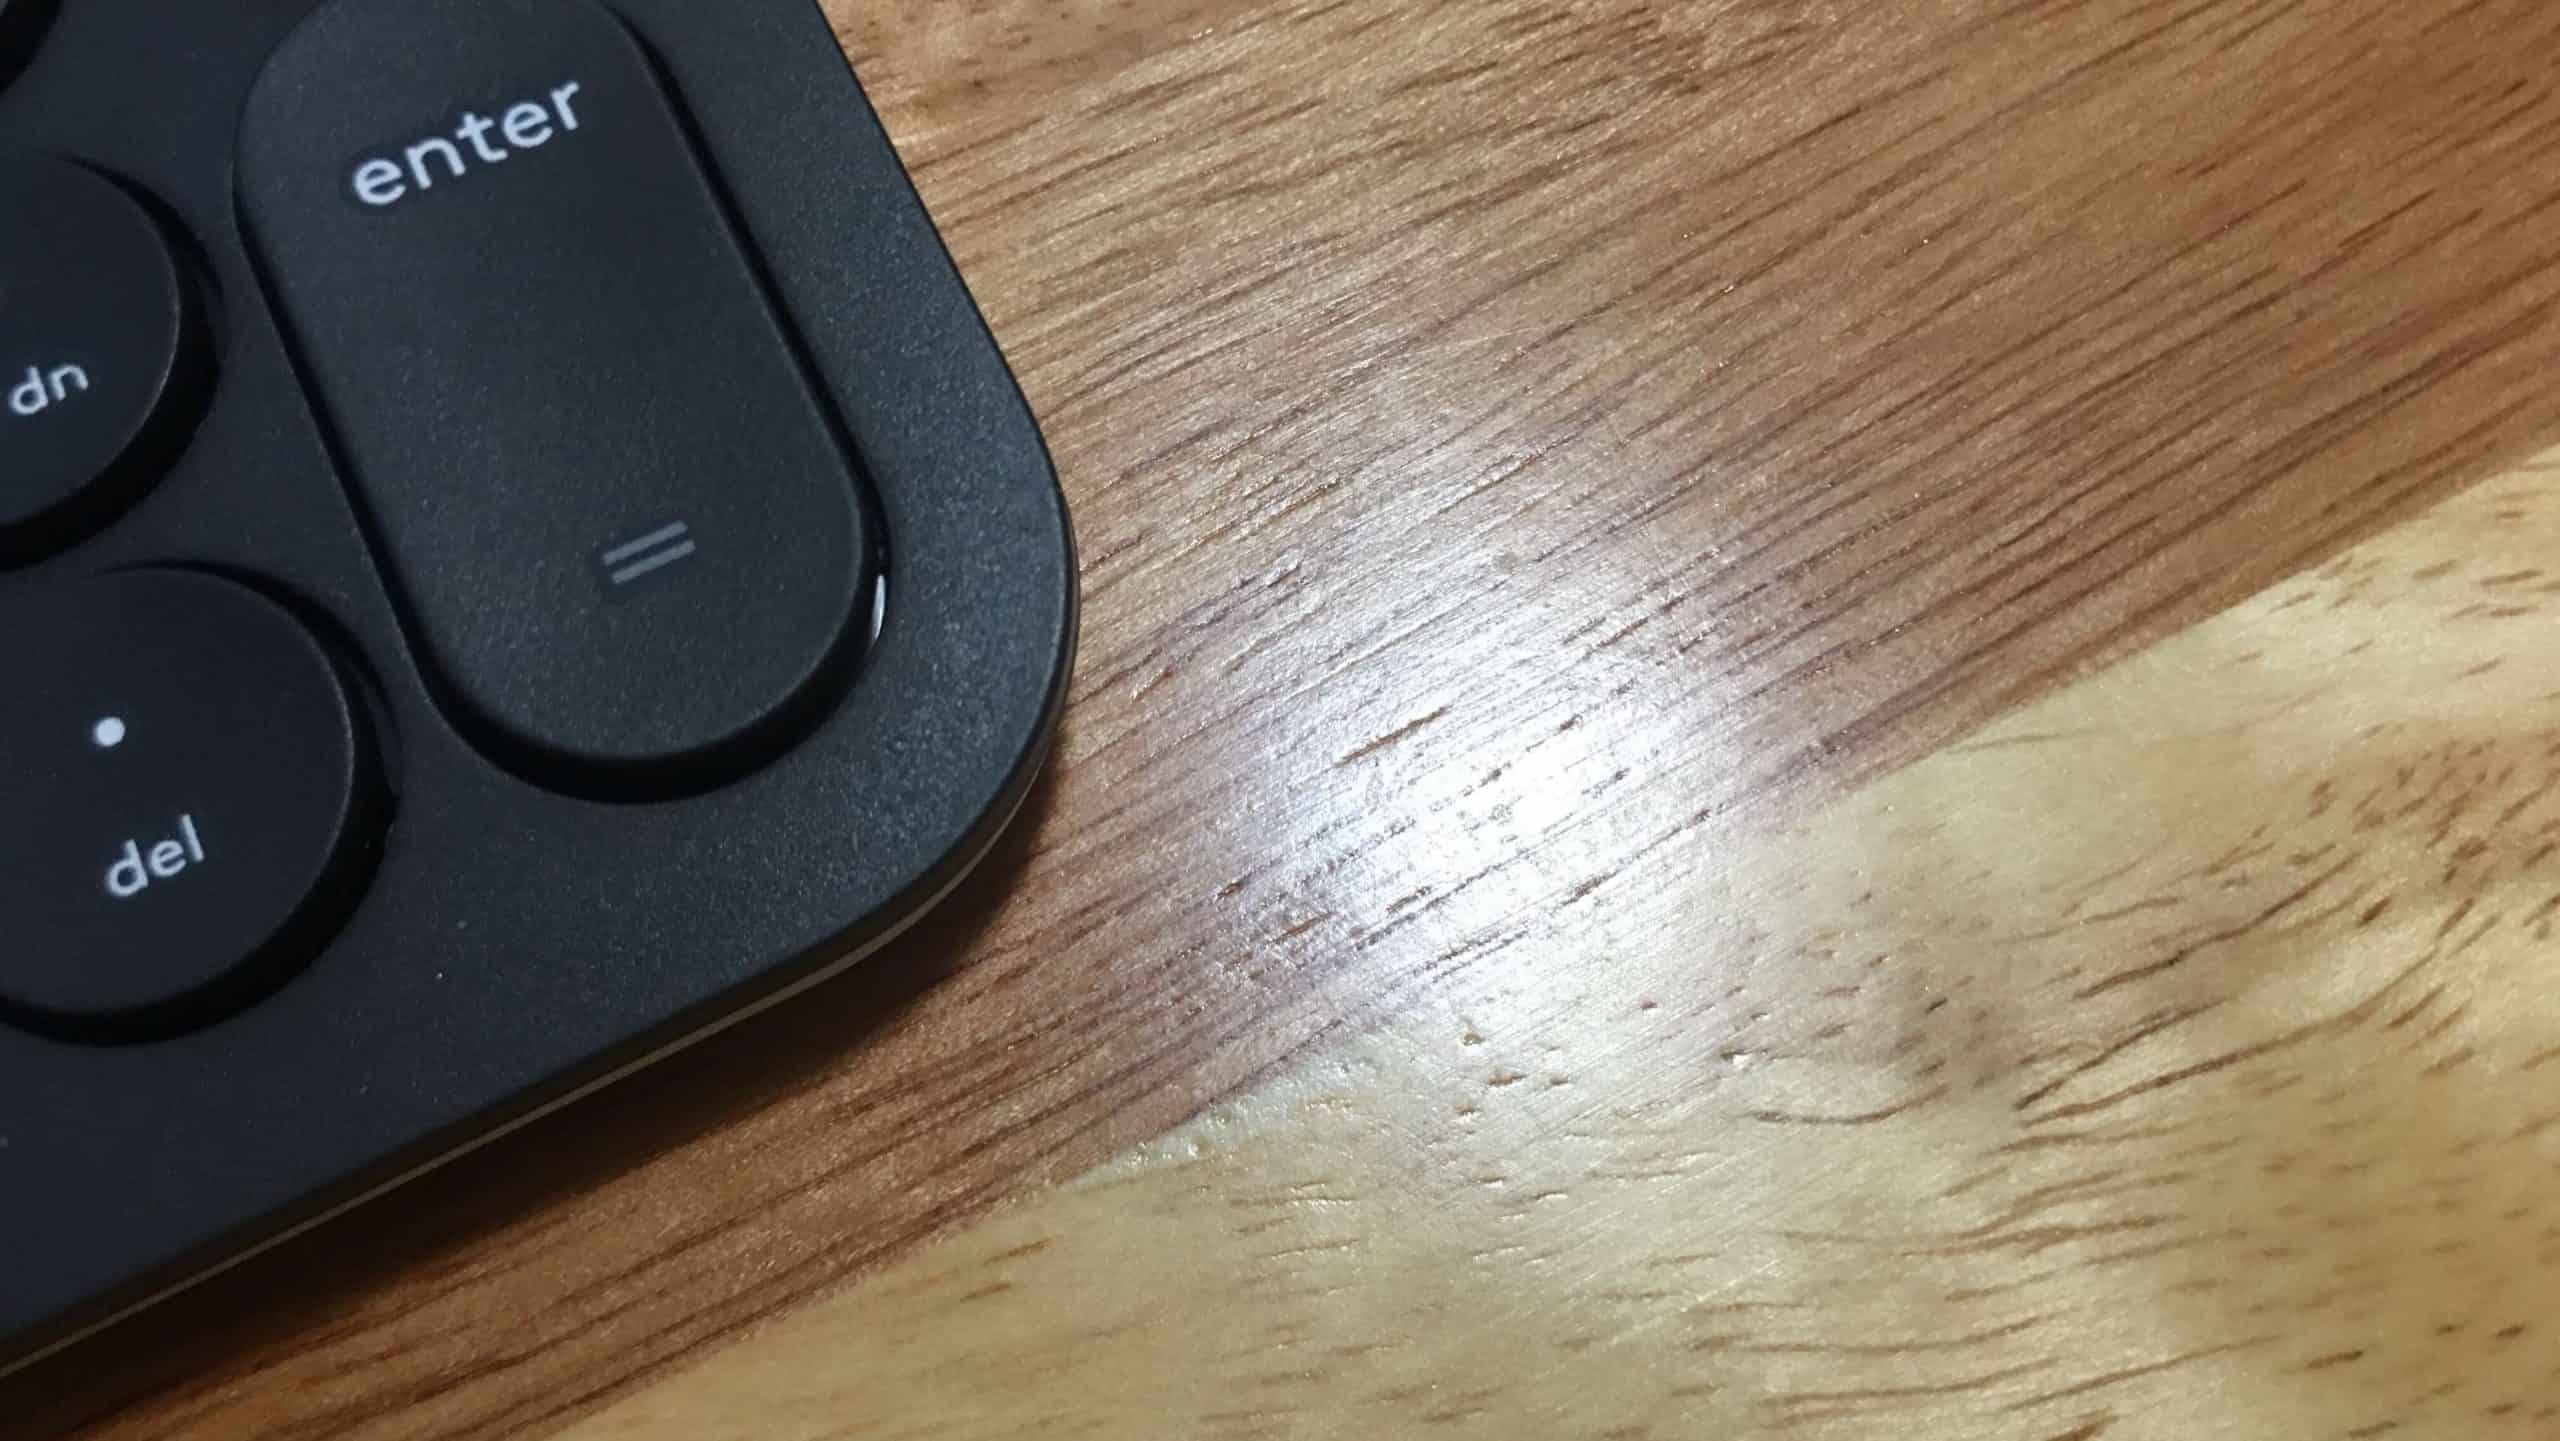
First, once you open the packaging, you have 48 hours to finish it with either a butcher block oil or stain and polyurethane. This is to seal the wood grain and prevent the wood from warping.
Secondly, it means you have to finish it to make it smooth and match the coloring you desire.
It’s not that hard.
Here are the “tools” I used:
- (1) Package of 220 Grit sandpaper
- (1) Package of tack cloth
- (3) 2 inch foam brush
- (1) Minwax Clear Satin Fast Drying Polyurethane
Steps to finish the butcher block desktop:
Just remember, the smoother the wood when you start, the smoother your finish will be. You can finish the entire process in 2-3 days depending on the number of polyurethane coats you want.
- Use a sanding block with the 220 grit sandpaper to give all sides and edges a smooth feel. (Note: the end grain edged will be the roughest and will require the most sanding)
- Use the tack cloth to remove ALL sawdust and debris from ALL sides and edges.
- Apply a thin coat of polyurethane on the top surface and all edges.
- Allow the coat to dry fully per the polyurethane instructions (typically 4 hours)
- Lightly sand the top surface and all edges until smooth.
- Repeat steps 2-5 as many times as needed. (I needed four coats to feel smooth and just the right sheen)
- After the final coat has fully dried, flip the desktop over and do the same to the final surface.
Monitor Mounting Solution
In my case, I wanted to keep as much desk space open to work on and so mounting the monitors to a stand that attached to the back of the desktop made the most sense.
Since most of my days include many Zoom meetings and I use an HD webcam for video, it was important to have the top of the monitors at about my eye level. This also happens to be the ergonomic standard for monitors.
That’s why I was happy to find the VIVO White Dual 13 to 27 inch LCD LED Monitor Desk Mount Stand whose mounting pole is actually 16 7/8″ tall. This allows the top of the 23″ inch monitors to sit a full 22 1/8″ above the desk surface. Perfect!
The mount was easy to assemble and mounts firmly to the back edge of the desktop via a sturdy screw clamp. Seriously, this thing is sturdy.
Cable Management Trays
Once the desk was put together and the computer equipment installed, I decided to tidy up the under desk cables, power strips and other items.
I found the Vivo Under Desk Cable Management Trays for a great price in a 2-pack.
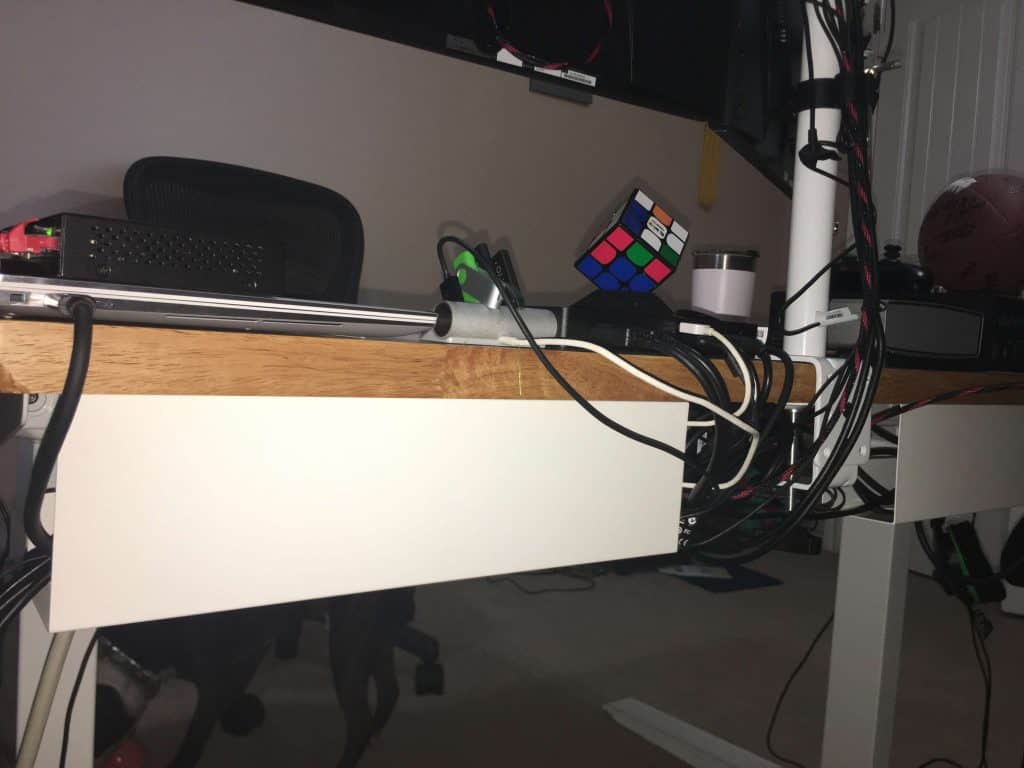
These units are fully metal, come in black or white colors and are the perfect companion to the white Vivo monitor arms. These things are heavy-duty and helped tidy things up well.
I mounted both at the back of the desk, one on each side of the monitor stand clamp that is centered along the desktop width.
Putting It All Together
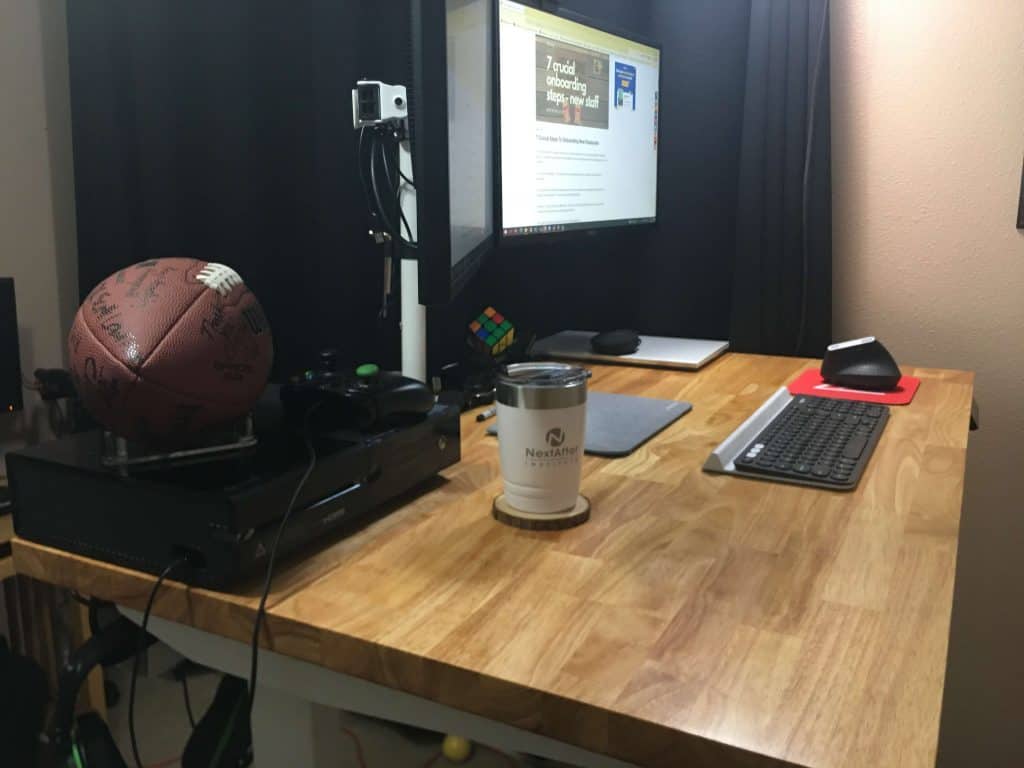
Okay, so it’s time to put all the pieces together.
This is the trickiest part because the butcher block desktop is not pre-drilled for the mounting hardware to the desk legs. But don’t worry, just take your time and measure a number of times before drilling.
I like to pre-drill the holes for the screws to ensure there is no cracking of the wood. Use a 1/8″ drill bit if using the Fully Jarvis mounting screws.
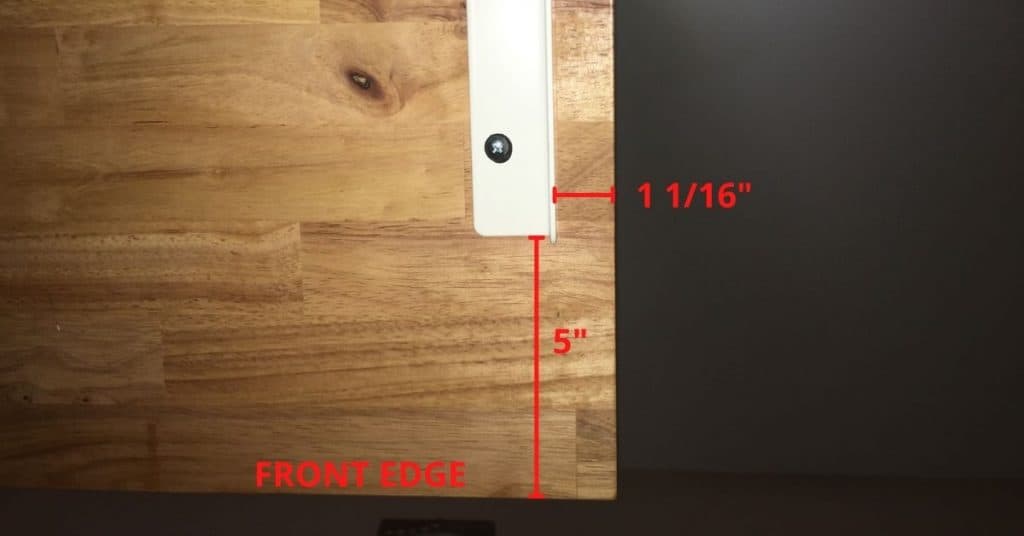
The 4-foot desktop was mounted with 1 1/16″ from the left/right edge of the desktop to the edge of the desk frame. Then, 5″ from the front of the desk to the front edge of the desk frame.
Get these measurements the same on both the left and right sides.
Then, drill the first mounting hole on the left only 1″ deep. Then loosely install the mounting screw.
Next, drill the first mounting hole on the right frame side only 1″ inch deep. Then loosely install the mounting screw.
Now, repeat this process for all mounting holes and screws. When done, tighten all the mounting screws without stripping them.
Voila! you’re done with the hardest part! Congratulations.
Pros and Cons of Single Motor vs Dual Motor Frames
In my research to find the best standing desk, I was unable to decide which single or dual motor frame would have been better for me.
While single motor frames are less expensive, they are noisier and have a smaller range of motion than the dual motor, 3-stage legs systems. Single motor frames also have a more limited lifting capacity than dual motor designs.
In the end, I purchased a dual-motor Jarvis frame since it had a number of advantages over single motor frames
Solid vs. Multi-Piece Desk Tops
Multi-piece desktops are much easier to ship and install because they can be broken down into smaller components. Multi-piece tops also cost significantly less than solid wood or stone surfaces since there is simply less material used.
Solid wood table tops like the one I installed might be heavier and therefore more expensive to transport/ship. They also require real, solid lengths of wood which can be more significantly more expensive depending on the wood species and size.
One area of concern is the evenness of the surface. This can affect you in two ways.
A multi-piece desktop may not be perfectly flat and can produce an irritating wobble in your keyboard to monitors on stands.
If you do drawing or writing on paper on the desk, multi-pieces desk surfaces will catch your pen or pencil at the seam formed when the desk pieces come together. This is a deal killer in my book.
For these reasons, a solid, one-piece wood desktop is the superior option.
Bonus Idea For People Under 5′ 10″ Tall
In all my research, I found an excellent, budget-friendly option that some people might love. Call it a hack if you want.
There is a Husky Adjustable Work Table that I found for less than $300. There is a 62″ x 24″ version as well as a 52″x24″.
Now, it is a manual adjustment, not electric, which means you crank the adjustment handle to move it up and down instead of a motor doing it for you.
If you use the included leveling feet, the table adjusts from 29″ to 42″ in height. Now, for a 6′ plus person like me, 42″ is not quite tall enough. But, if you are a little bit shorter or you want to build a custom base for the legs to raise it a few inches, this could be a steal of a deal.
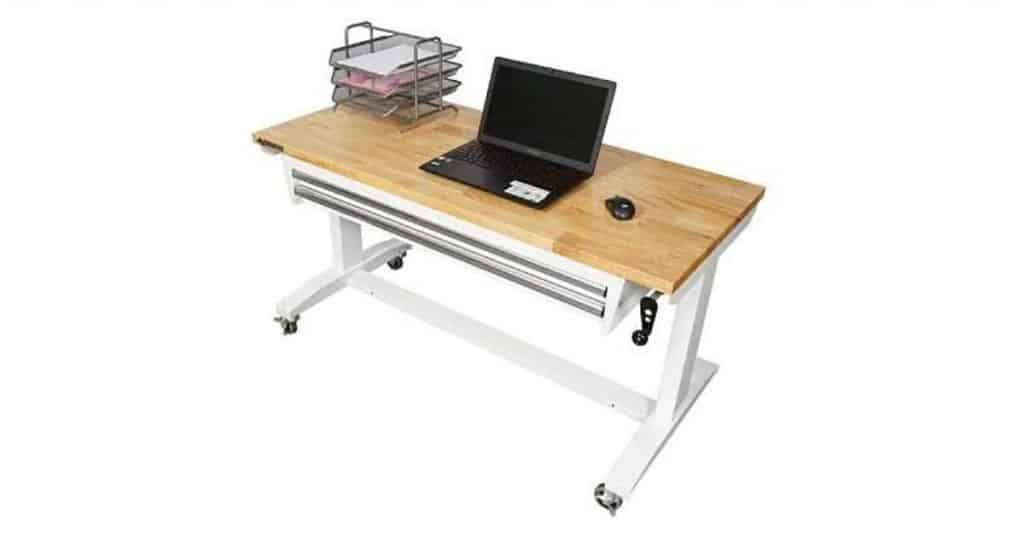
It comes in two configurations, one with two drawers and one with no drawers. Just remember that the drawers are under the tabletop so don’t forget to account for legroom if you get it.
Just note that there is a central lower cross member that may interfere with your feet while sitting, or use it as a place to prop your feet. (See the picture)
Looks like the price varies depending on where you get it and it is no longer on sale but still, it could be a great option.
Shopping List
Let’s make this easy for you. Below is a list of all the items used in this build with links to quickly purchase them. Hope this helps.
- Full Jarvis Frame Only (3 Stage, Wide, Programmable Memory controller)
- 48″ Rubberwood Unfinished Butcher Block Kitchen Countertop
- 220 Grit Sandpaper
- Tack cloth
- MinWax Clear Satin Polyurethane
- 2-inch Foam Brushes
- Vivo Dual Monitor Stand
- Vivo Cable Management Tray (2-Pack)
Conclusion
The best moderate budget home office standing desk for full-time home office workers is actually building your own from purchased parts. I’m not talking about all the small parts, but a couple of big pieces like the standing desk frame, solid wood desktop, and cable management trays.
I built the equivalent of a $1399 Fully Jarvis desk for only $632.82 while still getting the quality, quietness, and warranty of the Full Jarvis legs. This has hands down been the best investment in my home office, including my chair.
Related Questions
What is the best standup desk for the home office? The best standup desk for the home office is the Fully Jarvis Frame Only kit with the 3-stage legs, wide frame, and programmable memory controller combined with a 48″ Rubberwood unfinished butcher block countertop that is finished by hand with 4-7 coats of clear satin polyurethane.
What is the best standup desk for left-handed people? a straight worktop desk, without any return, is the best desk for left-handed employees. Get a wider desk if you need under-storage but stay away from corner and L-shaped desk, especially for left-handed people.
Are cheap standing desks worth it? As a general guideline, desks under $250 may fall into the “cheap” category and are not the best option if you will need the desk to continue working longer than 18-24 months. Some cheap desks have motors and parts that may fail in the first 6 months. Others have multi-piece tops that don’t perform well with writing work.


